For part three of this series we will examine creativity tools. Creativity tools are unique in the world of educational technology because they by their nature are not content or use specific. They are not reading, math, or typing programs designed to lead students through a series of drills (game based or not) and practice. They are not meant to provide remediation or score students (though they can be used for assessment). They are not tutorials. And though they have a specific use as in video, art, or audio creation, they do not have a specific use in a classroom. Creativity tools allow students to create and because they are creating they are by nature thinking more critically (and creatively). Creativity tools also allow students to express themselves in various mediums and in ways not possible with traditional tools.
The very best creativity tools are widely accessible, have an easy learning curve, and are adaptable for a multitude of use cases. I am going to briefly talk about three creativity tools that do vastly different things and then give a couple of examples of how they might be used in a classroom. Each of the three tools have a few shared characteristics. First, all three are web based and device agnostic. Second, all three are free and ad free. Third, all three are easy to use and have a robust help resource. Fourth, although they each had a different specific purpose (video, graphical, and audio) they can be used in multiple contexts.
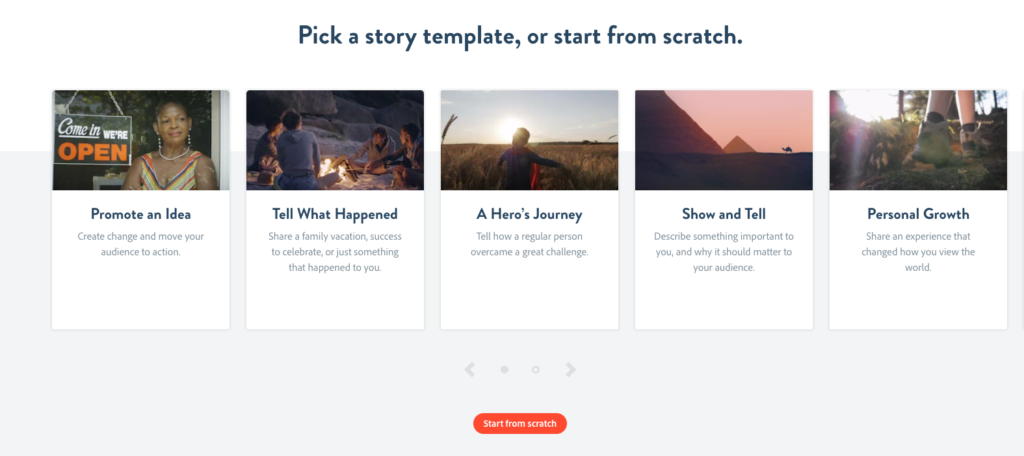
Adobe Spark is a multi purpose tool that allows users to easily create custom graphics, logos, single page websites, and videos that are beautiful and functional. Spark also has a large educator library for those with education accounts. You can easily build from templates or start from scratch, but the program is designed to ensure you finish with a visually pleasing final product. There are other tools that can do the graphical elements (such as Canva and Piktochart) that I prefer over Adobe Spark because they can be interactive and offer more customization, but when it comes to video Spark really shines. Spark isn’t a video editor, instead it helps you build a compelling story with video, images, background audio, and your voice. The templates are designed to walk you through each step of the story, or you can build from scratch. From there students can start to build their video by using high quality stock photos and videos from Adobe or add their own. They then select their background music and record their voiceover. The final product is a professional looking video.
The downside to Spark is that it isn’t a video editor. You cannot split, trim, or cut video together. If you don’t like the sound of your voice you are out of luck because you have to narrate. Though you can collaborate on the projects, you cannot work simultaneously like you can with Google products. This means you have to plan collaborative projects accordingly. I have used Spark for personal and school related projects as well as giving it as an option for students. The students and I both agree that way Spark is laid out makes it much less anxiety inducing to create a video based product.
Piktochart began as an infographic builder but has sense evolved into a full fledge interactive graphic design tool. If you have used Canva or Spark you will notice the interface is similar with a main canvas in the middle and nested tool bars along the left or right edge. Where Piktochart shines is its ability to incorporate interactive elements like videos, charts, and animations. Additionally any Piktochart can be turned into a presentation, shared on the web, or embedded into a website–as long as it isn’t WordPress :(. Here is an example. The downside to Piktochart is that it has so many options it can be overwhelming to use at first, so it is best to pick one of their professionally designed templates if you are a new user. The other downsides are the free account only allows you to create 5 projects and you cannot collaborate with others. Overall I like Piktochart as a creation tool though its overwhelming feature set and limited storage size might push users to Canva.
Anchor is a free podcast recorder, editor, producer, and publisher offered by Spotify. Podcasting can be a difficult medium to figure out as a novice. There are so many steps required to make a podcast and you need the skills of an audio engineer, writer, researcher, voice actor, web developer, and content distributor. Anchor takes care of all of the back end work so you can just focus on recording your content. The editor is easy to use and offers music integration with Spotify, transitions, listener messages. The program automatically processes the audio to normalize the volume and enhance the vocals. Building episodes are extremely easy with drag and drop abilities. The major drawback for Anchor is that it is not designed to be used by students. It can be monetized which means ads. This limits its usability for younger students. Because it is an audio publishing tool, it is obviously limited in how you would use it. With that said, the content, audio, and goal of a podcast is wide open. So even without video stimuli, podcast can get some mileage as you can see by simply scrolling through podcasts on your favorite podcast service. I like using Anchor for podcasts because it greatly simplifies the process, but students are less apt to use it because 1) they have to hear their own voice, and 2) you can’t edit takes so it results in multiple recordings of the same take.
Use Cases
I’m not going to go into depth cases for all three creativity tools, instead I will talk about two uses for Adobe Spark and how they stack up to SAMR and TPACK.
Use Case 1
During a research unit in AP English III, students were investigating solutions to a global problem of their choosing and offering solutions. The students utilize databases for research, conduct interviews with experts via Google Meet, and publish their research via Google Docs and Sites. But there is an additional part of this project. I want them to share their solutions with the world. This is where Adobe Spark came in. Students created either videos, posters, or websites to highlight the problem they researched and their proposed solution(s). They then published those to their websites and shared it out on social media and with the experts they interviewed. They were able to practice and implement their writing and research TEKS (C), complete a PBL based unit (P), and utilize the social sharing nature of Spark (T).
Use Case 2
As I spoke about in Part 2 of this series our student interns keep portfolios for the work they are doing throughout their internship. One piece of that portfolio is their teams OKRs and design SPRINTs. The purpose of their design SPRINT, which is completed the summer before they begin their work, is to utilize the design thinking process to develop the project they will be working on throughout the year. The final piece of that is to present their plan to their director for approval. The primary tool the interns use to present those plans (and the quarterly updates) is Spark. Each team of interns will use the part of Spark they feel communicates their plan best. So some will do a video pitch, others an infographic, and some a website or flyer. Part of the reason this is done this way is because the teams are very rarely physically together at the same time so all of this collaboration is done virtually and their pitch is typically done virtually as well. The instructional goal of teaching the entrepreneurship skills: ideation, design thinking, goal settings, and presentation/pitching (C) is easily accomplished in this format. The format of the SPRINT encourages collaboration, critical thinking, and creative thinking (P). Finally, the ability of Spark to be flexible and allow asynchronous collaboration (T) provides a means by which the interns can create powerful and persuasive pitches.
Conclusion
Creativity tools have a powerful ability to “trick” students into higher order thinking and creativity because they don’t a predisposed academic purpose. They are also tools that are applicable in all areas of life and work which give them real life authenticity that a purpose built academic program doesn’t afford.
In part two of ours Tech-Play-Test series we will examine ePortfolios and “folio thinking”.
Before diving into ePortfolios it is worth while to spend some. time talking about folios. Folio thinking is the acknowledgement that you can’t truly know what some knows or what skills they possess from traditional assessment tools. It requires a broader approach that can look at both learning/growth over time and the full breadth of skills, experiences, and knowledge one possesses. Also with folio thinking is an element of self reflection. A person with folio thinking is looking back on what they have accomplished and learned, and setting goals to propel themselves forward. They realize that there is more value in seeing themselves move over time instead of judging themselves from one snapshot in time.
Portfolios, wether electronic or physical, are an excellent way to live out folio thinking. Regarding the first point (assessment by others), portfolios are much more beneficial than traditional forms of assessment such as exams, essays, and homework. Though traditional forms of assessments can give a you a snapshot in time of how a student is doing on a specific skillset, they cannot, by their nature, tell a full story. Traditional assessments are meant to be norm referenced and comparative so they have to focus on narrow parameter. A portfolio can include those snapshots as part of a larger picture of a student.
Take this as example. Below is an extreme closeup of a piece of art. It is a snapshot of the picture from a very narrow parameter. It is ugly, undefined, and doesn’t really look like the artist knows what they are doing.
Close up of Vincent van Gogh’s The Starry Night
But if you zoom out and collect enough information you can see the whole picture.
Vincent van Gogh’s The Starry Night
To see and appreciate the genius of the work (or student) you need to see the whole picture.
As a learner portfolios are superior as well. They afford the learner the opportunity to receive feedback on their work as they progress through a course or program of study. Something as simple as writing portfolio allows a student to collect feedback, make revisions, and see the growth of their writing over time. It makes them better writers by providing a mechanism to reflect back on writing. Artists are able to reflect over the evolution of their work over time and across different medium as they build and refine their portfolio.
Portfolios also include elements of self discovery. There are times as you are looking back at your work and setting goals for what is to come that you begin to realize a passion or direction that might otherwise have hidden. Students tend to jump from one activity or assignment to the next without consideration about how they connect or what the personal connection is to the work they are doing. Portfolios force that to happen. Rarely does an exam, homework assignment, or essay elicit that same response on its own.
In talking about which I prefer: traditional assessments or portfolios, I think it is important to consider the context. When it comes to a certification, traditional assessments win all day long. That isn’t just because that is how it has always been done. It is because they are less subjective. I know X,Y, and Z or I don’t. I don’t want to rely on someones interpretation of what I know, I want it to be as clear cut as possible. Regarding almost any other scenario, portfolios come out on top. As I have said earlier portfolios allow the affordance of a broad lens to view skill set and understanding while also showing the ability to grow and adapt (necessary life skills). Most of life (work, schools, relationships, etc.) lives in shades of gray and assessing value in a way that ignores the gray for the simplicity of black and white is silly and short sighted.
So portfolios are the clear winner, but when do you use portfolios and when do you use eportfolios? The purpose and usecase for both are the same. Both are about created a curated selection of work that includes reflection and vision and that paint a full picture. Paper portfolios are best in a situation where the work presented is written (essays) or graphical (art or photography) and/or the audience does not want or have access to the internet. Eportfolios add the affordances of multiple types of media (print, images, video, audio, etc.) hyperlinking of information, interactivity, easy updating/sharing, and portability. Because of the nature of my work eportfolios are the best choice for what I do.
Now that I am done pontificating about portfolios, let’s talk about specific portfolio tools. Like Part 1 of this series I will talk about each and give you my take aways. The three eportfolio tools are: Google Sites, Bulb, and Wakelet.
Google sites is a free to use part of Google Workspace and integrates tightly with other Google Workspace apps like Drive, Docs, and Slides. For schools that already use Google Workspace for EDU. It is an easy to use website creator that is ideally suited for eportfolios. It does not allow the ability for replies or discussions and the content management features are not as robust as other paid eportfolio tools. There also isn’t a way for templates to be created or shared.
Bulb is a freemium web-based eportfolio tool popular in K-12 education. Anyone can sign up for a free account that provides a full range of portfolio features and limited storage. Schools or districts can purchase upgraded licenses to add management and moderation features that might be needed in an educational setting. Bulb does integrate with Google Workspace and has an easy to navigate interface and editor. Accounts stay with the student for life which means they can continue to use Bulb post school. Bulb does allow teachers and administrators to create templates to share with students. Also, Bulbs can instantly be turned into interactive presentations for presenting eportfolios.
Wakelet is also a free web-based eportfolio tool that looks more like Twitter than a traditional eportfolio. It is based on the principle of collaborative portfolios. This is a great option for group or team portfolios. It does host a full set of features and integrates with multiple other platforms like Google Workspace, Microsoft 365, and Flipgrid. It also features moderation and content control features like Blub, but they are free for K-12 districts. The major drawback for Wakelet is its organizational structure. It is hard to build organized eportfolios if you wish to maintain a traditional style.
For my eportfolio I am using Bulb because of its organization, ease of use, and novelty. ( have used the mess out of Google Sites). Bulb has a very low learning curve for teachers and students, but is robust enough that it can be adapted for whatever might be happening in the classroom. A robotics teacher might have their students keep their engineering notes in Bulb including snapshots of their build taken with their phone. English classes could keep writing and reflection logs. Science could keep lab notes. LOTE can keep audio and video recordings of their oral speaking along with reflections of their reading and writing.
I have used Bulb before with students and teachers:
Chrome Squad
The Chrome Squad is a student internship that focuses on entrepreneurship and computer science. They work in teams on various projects throughout their internship and keep track of their progress in an eportfolio using Bulb. The eportfolio is both individual and collaborative. The collaborative elements are their Objective and Key Results (goal setting protocol) and Design SPRINTs. The individual elements are the artifacts from their projects and reflection from their OKRs and projects. Each week the teams give me an update on their progress and updates their eportfolios. The portfolio includes video, audio, graphics, and text. The interns are constantly providing feedback to their teammates and setting goals based off their progress. This approach has pushed the interns to have a growth mindset, strive for their own growth, and think in terms of “moonshots”.
These eportfolios are on the Transform side of SAMR and address the following elements of TPACK:
C- Interns work collaboratively and autonomously to accomplish goals and further the district vision.
P- Goal setting, collaboration, reflection, and self reported grades (Haddie)
T- Eportfolio allows for the collection of multimedia artifacts, synchronous collaboration, and interactivity.
LEAD Learners
As part of a larger professional development program, we utilize micro-credentials as part of a program called LEAD Learners. Teachers earn badges for utilizing edtech tools and strategies that enhance or improve: students’ growth in content knowledge, agency, collaboration, and impact. To earn these badges the teachers must keep and update an eportfolio in Bulb that documents their use and reflection. After each entry the teachers request their new badge to put on a poster outside their door. This program is hugely popular and helped create an environment of continual learning and reflection.
These eportfolios did not require anything but pictures and text and were not collaborative so they would set on the Enhance side of SAMR. It does address the following elements of TPACK:
C-Teachers will grow in the meaningful integration of technology and reflect on its use.
P- Self directed learning and choice (Knowles)
T-Eportfolios allows for the collection of artifacts.
So there you have it. Eportfolios are a powerful tool for assessment, reflection, and growth.
In part one of this series we are going to take a deep dive at blogs. A Blog, shortened from the term “weblog”, is possibly the mostly easily accessible way to establish an online presence outside of social media platforms. Blogs are a format of online publishing that can range from self published articles, to tutorials, to very public diaries. They are primarily texted based with embedded images, graphics, and videos although there are offshoots like vlogs (video based web logs) and glogs (graphics based web logs). As far as organization, blogs are typically organized in reverse chronological order so the most recent “post” is what first appears. Blogs may also be organized by topic, strand, or category, and are searchable by “tags” placed in the blogs metadata. Blogging became a mainstream possibility in the late 1990’s when posting to the web became a possible without a background in HTML or coding. It wasn’t until the 2000’s that blogs became common place 1. This is in part due to the the creation of dedicated blogging platforms like Blogger and the adoption of blogs by organizations and publishers.
There is an element of social networking that happens with blogs (even more so with micro-blogging platforms like Twitter and Instagram) but it is rudimentary at best. This began with the ability for blog readers to subscribe and comment. When a reader subscribes to a blog they are agreeing to receive notifications, typically by email, of new blog posts as they are published. This is also possible with blog aggregators like Feedly, Flipboard, and Pocket. The ability to leave and reply to comments on a specific blog post created an avenue for pseudo-discussion boards focused on the content of the post.
Speaking of blogging platforms, I took three for a spin: Blogger, WordPress, and Wix. All three share similar affordances, but there are trade offs with each. All three or are technically free (WordPress is free but you must pay for server hosting), and relatively simple to use from the start. All three platforms give you the flexibility to create multimedia blogs, vlogs, and/or glogs. You can also create multiple pages to house different topics or additional content besides your blog (much like a traditional website). A selection of organized themes are standard for all three platforms with Blogger being, in all honesty, the ugliest and WordPress and Wix being the most visually pleasing. Additionally, all three allow for multiple authors and editors, have moderation tools for comments, and allow customized domains (for an additional cost).
As I said earlier, each platform have unique benefits and trade offs:
Blogger
Benefits
A part of Google suite of products so it integrates well for Google Workspace users
Largest free blogging platform in the world
Large user and help community
Google Analytics integrated
Trade offs
Dated design
Lack of plugin or widgets
Limited post formatting options (i.e. custom headers and post layout)
Wix
Benefits
Intuitive interface
WIX ADI makes creating blog very easy
Modern and pleasing themes
Helpful plugins
Trade offs
Can be overly feature rich for a new user
Publishing post takes more clicks
WordPress
Benefits
Completely open design experience
Unlimited themes and plugins
Trade offs
Very complicated for first time users
Requires purchasing a hosting service or to host on your own server
Blogs as an educational tool affords many possibilities. They provide an avenue for students to publish their work for a real audience. It give teachers and students alike a voice and a larger audience than those in the four walls of a classroom. They can be used to create and share portfolios, discussion forums, and repositories. Blogs give students a means to practice written communication and teachers a way to share additional learning and resources with students. For professional development leaders, blogs afford the opportunities to extent the PD session beyond the bounds of the session. For example, you will often see PD leaders post not only the content of their sessions, but also further commentary, videos, etc. on the topic.
I can think of two specific use cases for blogs based off my background in English/Language Arts and Instructional Technology.
English/Language Arts
One struggle I always had with teaching English is getting students to write authentically about what they are reading. Something I have done in the past is to create a blog that had multiple threads. Each thread has a genre of writing or reading that the students will be studying at that time. The students would, for example, during the argumentative text unit respond to a given prompt with their argument using evidence from documents discussed/read during class. Each student would be an author for the blog so they could post their writing as post on that thread/page. They could also use the comment feature to respond to classmate’s posts.
This would facilitate students thinking, writing, and communicating at analyze, evaluate, and create level of Blooms. It promotes agency and communication while also scaffolding because students that struggle with a task will be able to see examples from their peers to model. This approach uses all the features of blogs: public facing, multi authoring, and dialogical. With that said it would likely only be in the enhance area of SAMR because although it makes the sharing easier, it can be done in a classroom setting on paper using the Kagan strategy Think-Write-Round-Robin.
Chrome Squad Portfolios
A second strategy that I have implemented in the past is using blogs as a portfolio tool for my student interns, the Chrome Squad. The Chrome Squad is organized into teams that work on specific job related tasks. For example, the podcast team writes, records, edits, produces, and publishes podcast. They are required to keep a portfolio of their work over the year(s) they are in the program. They have used these portfolios to successfully earn scholarships, get admitted into colleges, and find employment. Each intern creates a blog, with most using either Blogger or Bulb. They keep artifacts of the projects their team has worked on , a history of their design thinking progress, and a log of their OKRs. OKR stands for Objectives and Key Results and is a form of goal setting that forces them to create “moon shot” goals with no more than a 60% chance of success. They then have to create a measurement metrics for the goal and track their progress towards that goal over time.
Their portfolio includes videos, images, graphics, audio files, embedded elements, and of course writing. These portfolio force them to think at the create and evaluate levels of Blooms. The idea of tracking their progress and reflecting on their work is based on Haddie’s Visible Learning which identifies goal setting, reflection, and meta-cognition as having large effect size. The ideas of moon shots is based on the work of Astro Teller and is well documented in the business world as a way to encourage risk taking and agency. Blogs are perfectly suited for this because they can organize the blog in either a stream of consciousness, chronological, or topical format. It also allows them to uses multiple forms of media and embedded items.
Conclusion
Now there are limitations to using blogs. First, they require time to be spent teaching both yourself and students how to use them. Second, there are privacy concerns particularly with younger students. A product like Bulb or KidBlog might be a better solution, or using Google Docs/Sites as a sort of pseudo-blog. Third, blogs are difficult to grade. If each student has a blog that they post to once a week, and you have 150 students. That is 150 individual links to be clicked and read. (Here is a hint. They don’t have to be graded to have value. They just have to have real readers.)
Despite this, with the right training and oversight by the teacher the benefits of blogs outweigh the concerns. Blogs have the power to give students a voice and make the world feel smaller. When I had my students blogging they found they quickly had real life people reading and responding to their posts from all over the country. It brought value to what they were doing and made them want to write more often and better.
In this three part series I would like to share the journey of how the Chrome Squad, an elite group of student interns that support my district’s 1-1 program, came to be, but first a disclaimer.
Someone asking me to talk about the success of the Chrome Squad feels like being asked to not just tell your life story but the life story of your parents as well. What I mean is the Chrome Squad is less than a year old and is the product of not just my efforts, but of many others. To start with the conception of the Chromies (as they call themselves) is to miss so much of what makes them work. It is like explaining what makes me, well me, without talking about those that influenced me. Some people don’t like sharing their stories, but I find it encouraging to share, so share the Chrome Squad life story–with all its caveats and flashbacks–I will.
Let’s talk about what you can expect out of this series of articles so you have an idea of what you are getting into.
I won’t be giving 10 tidy steps to creating a student internship program, though I would love to help you create one.
I will be sharing our journey to where we are and where we are going.
I will also talk about the hiccups
I will share and invite to ask more questions
Where did the idea come from?
Six years ago (or maybe longer–kids have killed my memory) Kevin Worthy came to Royse City as our Superintendent of Schools and a vision in tow. It was a simple, but mighty vision: be all about the kids and be innovative. It took a few years, and a strategic plan, but we progressed as a district on those two fronts. Part of that strategic plan was to move 1-1 with our students. We saw districts that tried and failed because of poor planning, poor training, poor infrastructure, or a combination thereof. It was decided to take a more measured approach. The first step was to get the right people in place. Three years ago RCISD hired Zach Snow as the Instructional Technology Coordinator and did the crazy thing of placing him not in the technology department, but the newly reorganized curriculum department head by Assistant Superintendent Julia Robinson. This is a seemingly small distinction, but if the focus was going to be on instruction and not on the technology, then department placement is key.
Over the next two years Zach created and groomed a team of classroom teachers on each campus to provide professional development for teachers. The team, the iCoaches, focused on training teachers to effectively use technology to impact student learning. They were provided training and support by Zach and the always awesome Kasey Bell. This is where I enter the narrative. At the time I was in my sevenish year (can you tell I’m not good with remembering dates) of teaching high school English. I became part of the iCoach team as one of the three members from the high school. As a teacher I believe my job is to inspire my students and facilitate their learning, so I stir their appetite and set the table for learning. The students do the rest. That mindset and the ability to work with and train teachers made me a great fit for the vision that Kevin and his team had for Royse City.
The last missing member of the team was a CTO who embraced and supported the vision of RCISD. That came with Stuart Burt a year ago. With Stuart and myself added we were able to move forward with a 1-1 and empower students to be leaders. Finally, the silent partner in all of this is our awesome school board who caught the vision early and supported it all the way.
While this is all happening research, testing, upgrading of infrastructure, and training were being done to prep the district to go 1-1. We also realized early on that the conversation needed to switch from 1-1 to resourcing students. After all, it is about the students, not the technology, leading us to developed the framework for our program (we never call it an initiative) Connected for Learning (C4L): connecting students with the resources to Collaborate, Create, think Critically, and Connect with the world.
I know what you are thinking at this point: “that is a whole lot of backstory and you haven’t even mentioned the Chrome Squad.” That is a good point, but I hope you see there is no Chrome Squad without the right leadership in place to support such a program. But, fear not I am ready to tell you about the Chrome Squad and will happily do so in the next installment.
Part 2:
Building the Chrome Squad
In the previous installment of this series I extolled the leadership of my district and how they were pivotal in the creation of the Chrome Squad. Having the right leaders creates the bedrock to build a solid program. It is on that foundation that I started building the Chrome Squad. So at long last here is their part of the story.
What is Chrome Squad?
This time last year I was hired as the Digital Learning Specialist for Royse City High School. (Don’t worry I am going to talk about the Chrome Squad; promise). I would have to manage an inventory of 1500+ Chromebooks, student and teacher GAFE accounts, ongoing and regular teacher training (small group, large group, and individual), and help the student body with any and all issues they may have with their Chromebooks and/or GAFE and Windows accounts. Oh, I also got the “privilege” to handle all the paperwork for acceptable use policies, user agreements, and other extraneous paperwork. They did tell me I could use students to help–that was nice. (On a side note, I found out later they originally planned on hiring three people for my position).
Enter the Chrome Squad…(Cue intense walk-in theme music)
I quickly decided to take up Zach and Stuart’s offer to use students. I needed students to not only help, but effectively take over the management of the Chromebooks, and teacher/student support so I could focus on working with teachers to integrate technology in an effective manner. So it was decided the Chrome Squad would be a hand selected group of high school students that works as a team to manage every aspect of C4L. They would be elite customer service and technology ninjas. I shall dub them Teenage Mutant Ninja Chromies. Who knows, it might catch on…
How did I select them?
I have researched how other schools set up their student programs. Some retrofit existing programs/classes like computer maintenance. Some created after school positions via the technology department. The common denominator was the kids were selected because of technological prowess. I decided to go a different route. My program was going to be a legitimate internship with a focus on customer service and business skills. It was also going to be student focused. That meant I would be playing the part of manager and the students would handle all the operational details. Feel free to freak out now if you wish; I gave it 50/50 odds it would blow up in my face.
If it was going to work I would need to hand select the interns. (Like a real internship, go figure). I decided to not start with applications, but with teacher nominations. I asked teachers to nominate students that demonstrated:
Consistent, quality work
Respect for peers and respected by others
Teachability and an ability to learn quickly
Integrity
Self-Control
I recommended, but did not require, tech savvy because I can teach the tech skills; the others not so much. I also only took nominees that were current Freshmen-Juniors. I did this because I want the students to have a year on campus. Of the nearly 1600 students at the HS I received 60ish nominations. I then created a committee of teachers to vet each of the nominees. If anyone on the committee question the nominees on any of the characteristics above I took them off the list. This brought the list down to around 30. I then interviewed each nominee (this year, year two, the Chrome Squad helped with interviews) and selected the top 21 nominees. I got the best all around students in the school. In our first meeting together after being selected they dubbed themselves the Chrome Squad and created their moniker.
What do they do?
The Chromies are the front line of tech support for both the students and the teachers of RCHS. This requires that they be versed in Windows, peripheral troubleshooting, Chromebooks, Chrome OS, GAFE, basic computer networking, blogging, social media, video production, inventory management, and customer service. I was talking with a 30 year education veteran about all I would be asking from the Chrome Squad and he thought I was out of my mind. In his words, “There is no way they can do all that.” The truth is I’m probably a little crazy, but I’ve seen crazier so why not put the bar on the highest rung I can reach and see if my kids can reach it too.
With a bar set that high I needed to spend some time setting the team up for success. The Chrome Squad meet with me over several days in August and we spent time talking about expectations, team building, and training. I pushed heavily for great customer service and responsibility. They were taught to think of the C4L Lounge (their base of operation) as their home and everyone who entered as a guest. It didn’t matter if the Chrome Squad had all the technical answers if their guests didn’t leave with a smile on their face and desire to come back next time they needed help. Once I successfully beat a dead horse in regards to customer service we switched to GAFE, Chromebooks, troubleshooting, and the rest. The Chrome Squad also trained on how to create blogs and videos, edit a website, and all the other procedures of running this size of operation. The goal was to have them so well trained that they could operate day-to-day without me because there would be days I wouldn’t be there. They also unboxed, tagged, and enrolled 1500 Chromebooks in 4 days. When it came time to handout Chromebooks to the student body the Chrome Squad was on hand to check out Chromebooks, reset passwords, and give students a tour of their new device. They showed themselves capable of reaching the bar I set and then they decided to move it even higher.
Evolution of the team
As the year began the Chrome Squad was focused on everyone doing the same job: helping teachers with technical issues, repairing broken Chromebooks, resetting passwords for students, and writing whatever blog or making whatever video I assigned to them. We were focused on building up the content on our website so our teachers and students had resources readily available as well as providing prompt and quality face-to-face support. Then around Thanksgiving, as things slowed a little, I decided to give the interns a week of “20% Time”. I didn’t hand out assignments, instead I let them work on any project they wanted as long as it benefited C4L and they didn’t overlook their standard duties.
The ideas that developed were:
Build a charging station for students to charge their Chromebooks
Create an online system for course registration
Create a public relations team to publicise Chrome Squad and C4L resources
Create a teacher badge system to reward and challenge teachers to integrate technology
Tech Tips posters, table tents, announcements, and commercials
A student run store that sales electronics and accessories for Chromebooks
A Google Classroom for the campus that provides a back channel for asking questions and posting tips and tricks
The ideas they came up with were huge and had far reaching effects. That is when I had the idea to form departments around these great ideas. The Chrome Squad members decided on the department they wanted to work and I set department leads to help organize the flow of information. The teams now create 3 week and 6 week goals to keep themselves accountable and I check in on them each week during our “Staff Meetings”. Here is the crazy thing–the members of each team often don’t see each other on a daily basis. They have to communicate and work together digitally. It’s like magic.
You can see the eight departments of Chrome Squad
We are now preparing for year two for the program and I let the Chrome Squad help me with the interviews and the team is going to be really strong next year despite losing nearly half the team to graduation. This summer we are going to revamp the website and create an all new inventory system that streamlines our back end process. We are going to be awesome and I can exhale now that I am confident it isn’t going to blow up in my face.
Welp, I only have two more promise left to fulfill in this series of posts: What would I change and where can you get help creating your own group of interns? Check the next and final installment to get the answers you seek…hopefully.
Part 3:
Resources for Building Your Own Student Internship
In the previous two parts of this series I shared the journey that led to the formation of the Chrome Squad–an elite team of student interns. In the final part of this series I feel it prudent to give you some help creating your own team of super powered teenagers (don’t worry, it isn’t as scary as it sounds). I firmly believe each environment has its own unique variables so I won’t be giving you the “Idiot’s Guide to Student Internship” version of this. Instead I will share the resources I have and let you start your own journey.
Selecting Interns
It is okay to have an application process, especially if you are new to the school or don’t know the students, but teacher–and student if possible–input is key to making sure you are getting the right group of students together. That is why I created a teacher advisory group to help me. When forming that teacher group make sure to create a motley crew so you will gain input from all aspects of campus life. The teacher advisory group has been instrumental in choosing the right interns.
It is also a good idea to interview the candidates and ask non-traditional questions that highlight those character traits you want in your interns. My favorite question that we asked this year was, “If you were given the time in school, the resources, and the permission to do/make/create anything you want, what would it be?” It allowed the candidate to show what they were passionate about and let us see how their passion might fit in with Chrome Squad.
If you follow a process similar to the Chrome Squad selection process (recommendations> teacher vetting> interviews) you will often end up with the best kids in the school. It can be hard to turn down one of them. It’s like someone placing all the flavors of Blue Bell in front of you and asking you to pick just one. It is torture. This is where team dynamics come into play. Can they handle the stress of working alone? Will they work well with the rest of the team? Can they be equal measures leader and follower? In the end I selected members that wanted to help others, better the school, were willing to put their wants aside for the good of the team, and pass the “talents” test.
The Talents test is the idea that if you give them something and time to work on it, the end result of that process will be greater than the initial investment.
Selecting a Leader
It is a little weird writing this part because, well, I’m talking like I have it all together. I don’t, but this is the leader I want to be and the brief glimpses of these traits in me has helped shape the Chrome Squad. So here I go.
It is also important to have the right adult leading the group. They should be someone that can command respect by serving and teaching the interns well. Someone who will say, “I love your idea so much that I am going to take your workload today so you can focus on making it a reality.” Someone that encourages innovation and pushes the interns to be better. A leader that can set up the boundaries for the interns to work in that are broad enough to allow freedom, but firm enough that the interns have structure to depend on. (I think I got that last one from a parenting book somewhere.)
Structure
Speaking of structure. I set up the basic framework for the Chrome Squad so they knew the non-negotiables. They will be respected and respectful. They will be about helping others. They will be problem solvers and creators. They will be diligent. They will be awesome. I made it clear what the consequences would be for violating a non-negotiable: dismissal from the Chrome Squad. You can check out the Chrome Squad policies here. The rest of the structure for the team developed as they made the program their own. Check part two of this series to see how the Chrome Squad organized themselves. As the Chrome Squad continues to evolve our structure will evolve with it. I recommend you let the structure of your team be organic so that it can develop and adapt to future changes.
Space
Once you have interns and structure to operate in, the interns will need a place to work. The space should be welcoming to students and suitable for working. The space we designed was colorful, yet calm, with “pub style” tables, couches and a standing height whiteboard table. This gave the Chrome Squad a place to call their own. It is their room to make inviting to guests and to take responsibility for.
Who to Talk To
Because this is only year two of this program I don’t have a vast library or resources curated to share with you, but what I do have is a Twitter handle, email address, and phone number. Feel free to contact me with questions. I would love to help you setup your own student internship.
Finally (sort of), the Chrome Squad has had a few opportunities to speak about their success and share their recommendations on what to do to run a student intern program that works. Here are a few of their top dos and a few don’ts.
Do:
Put the right team of students together
Push them beyond what they think they can do
Allow the freedom to be awesome
Get the right adult for the job (Someone that has a clear vision, but open to the path to get there)
Make the program your own
Expect problems and roll with them
Don’t:
Expect to “cookie-cutter” another program
Be afraid of failure
Quit when failure happens
Be closed to adapting
Closing
So here we are at the end of, as the wonderful Kasey Bell says, “LONG!”, three part series on creating a student internship and what can I say–the Chrome Squad is amazing! People look at me and say “Wow! You have done an amazing job!” I blush and try to put the focus back on the kids, because they are the miracle workers. I play my small part in the story and let the real stars do the shining. If you would like to know more about the Chrome Squad and Connected for Learning you can find us online at blog.rcisd.org/C4L , on Twitter @chrome_squad, or contact me at holtn@rcisd.org.